|
|
Post by twood3006 on Jan 22, 2011 9:58:58 GMT -5
This is the first step, disassemble.  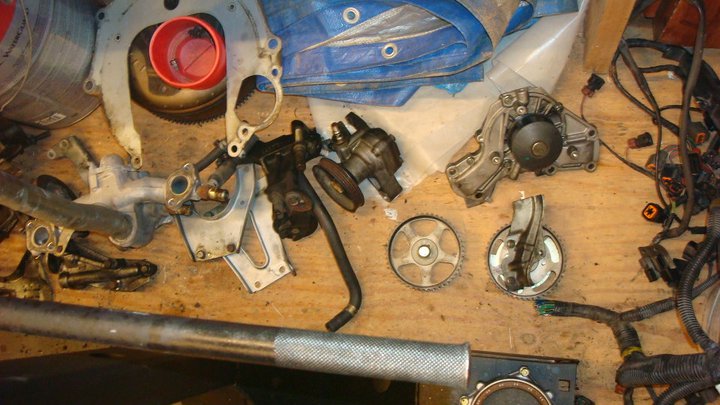 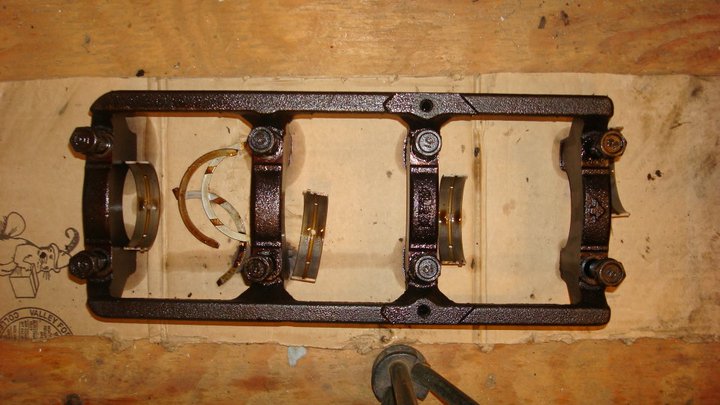 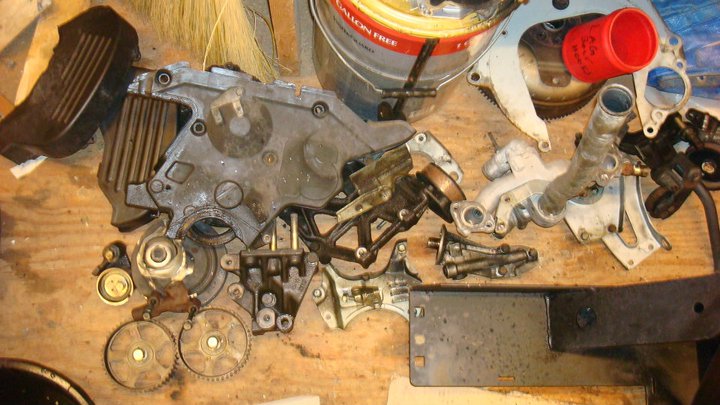 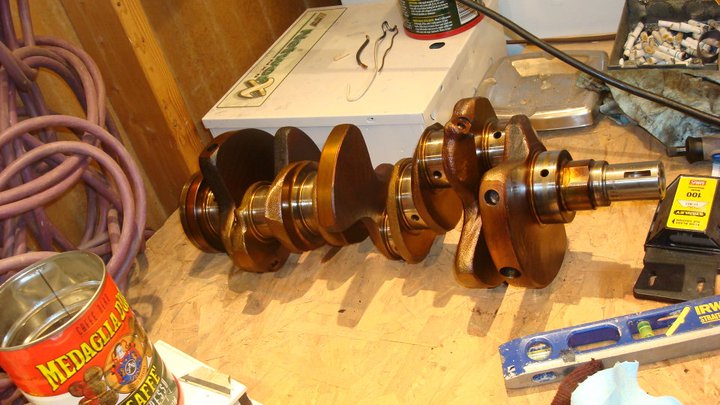 I got this engine from a 95 Diamante in the junkyard for $100 bucks, my brother and I pulled it out ourselves in a couple of hours. I built the engine stand and began taking it apart and cleaning it up. This engine had 175,000 miles on it and with the exception of the bent valves from a broken timing belt (new one was obviously just installed and in really good shape) did not seem to show it's age. The cylinders were in good shape and required a mild honing and new pistons and rings. The heads were my main focus, I made a valve spring compressor. 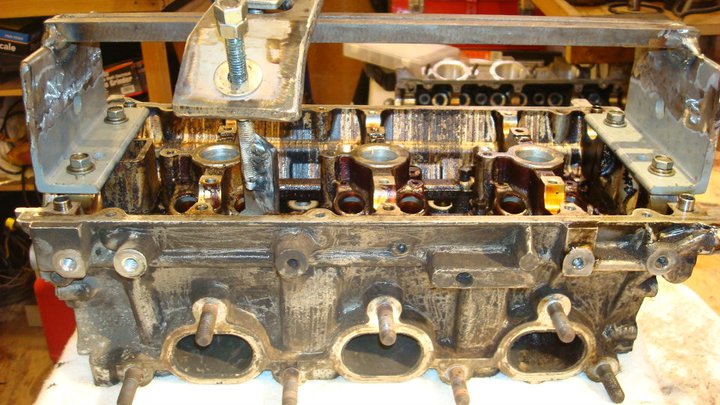 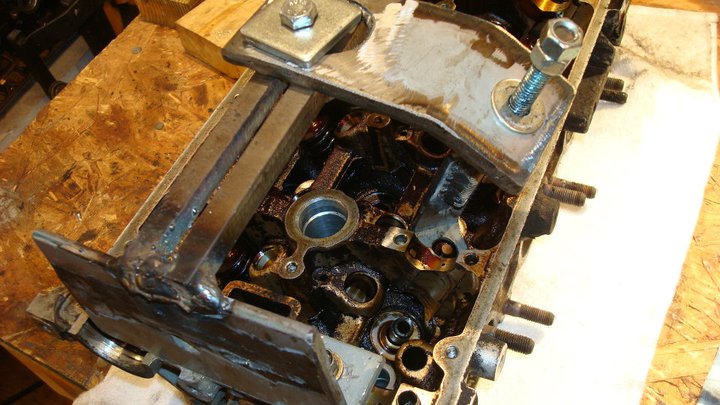 And planned to re-surface the valves, didn't know they were bent at the time. After buying new valves, I ported and polished them and installed a 3-angle valve job using the neway system. Before: 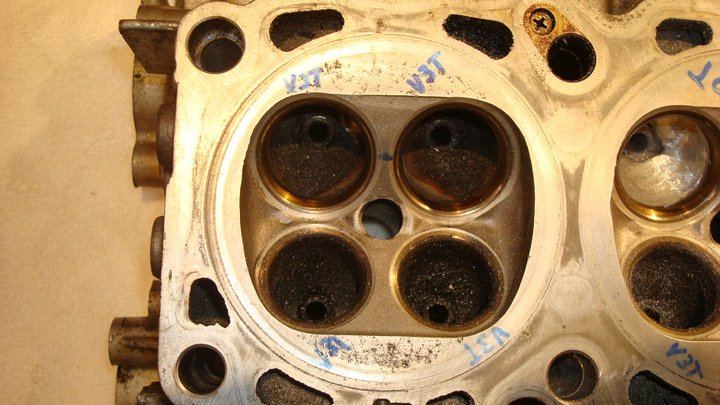 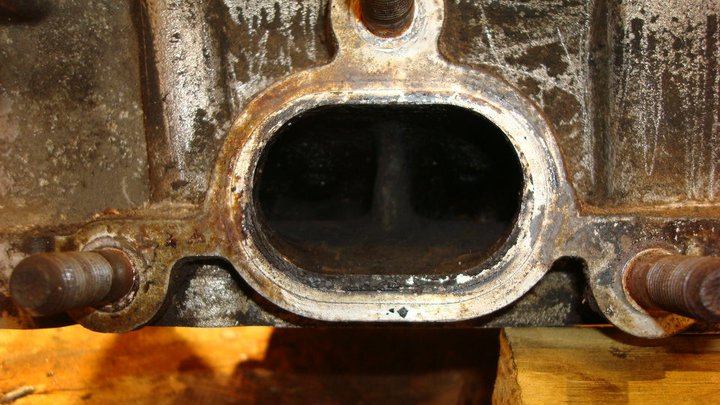 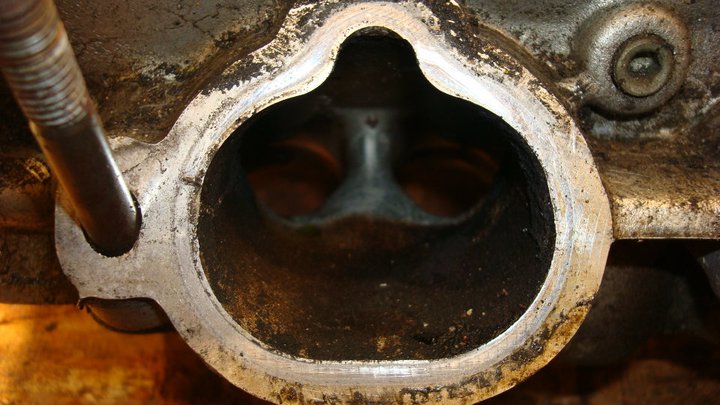 After: 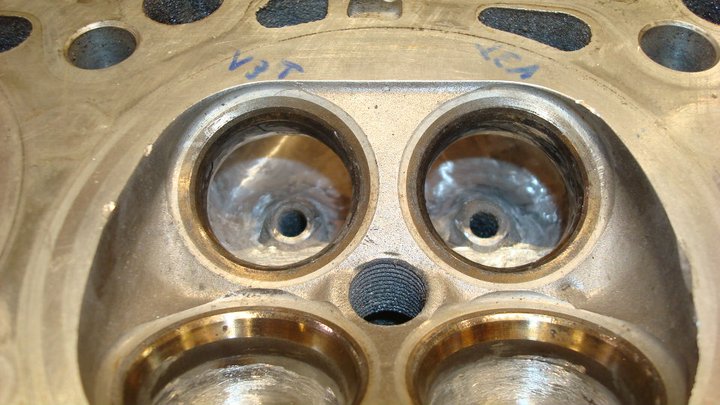 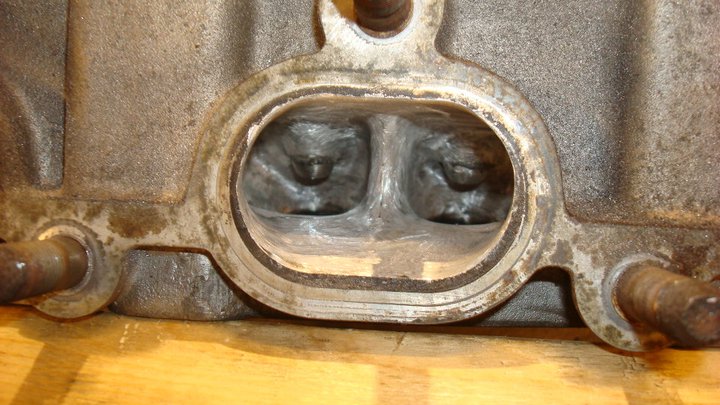 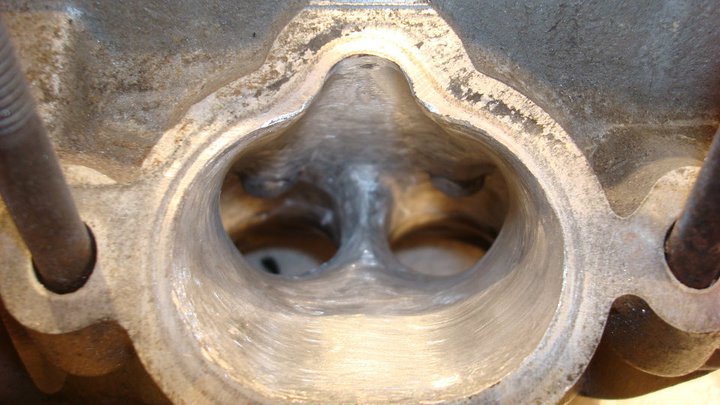 Reconditioned heads with valves installed: 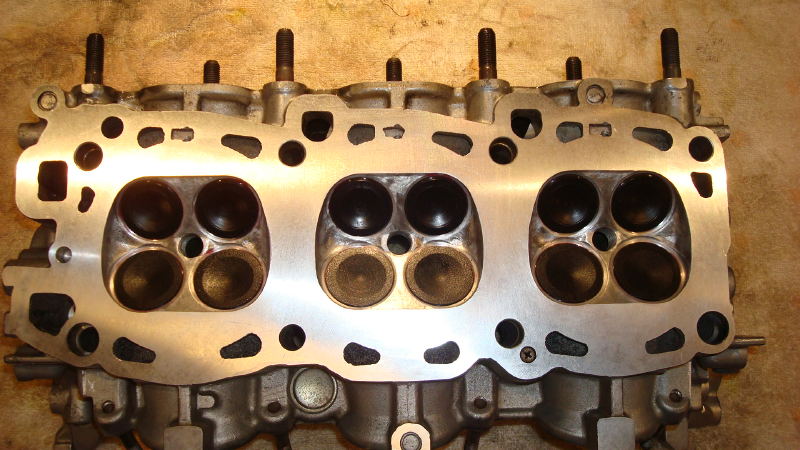 Had the heads resurfaced by Kannapolis Engine Service and the Crank polished and checked for wear. Took about a day and both came back in great shape, Standard sized bearings were required on the crank shaft. Forgot to take some shots as I assembled it, but this is what I did get. My Neighbor was kind enough to powder coat the valve covers, manifold and fuel rail. The manifold and fuel rail are yet to be installed. 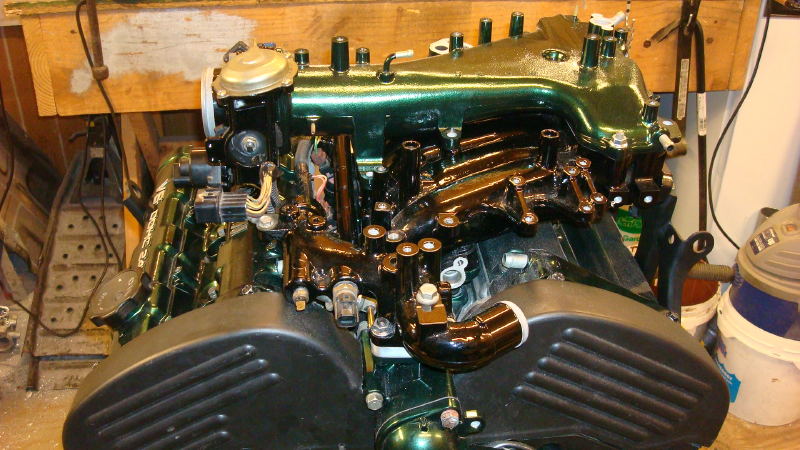 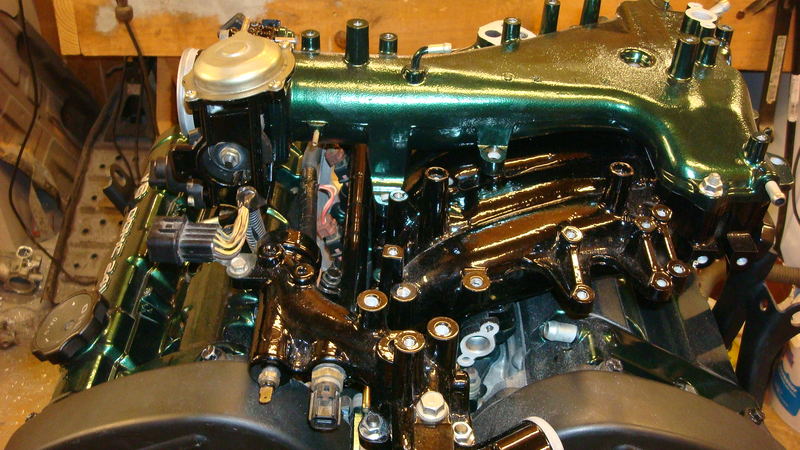 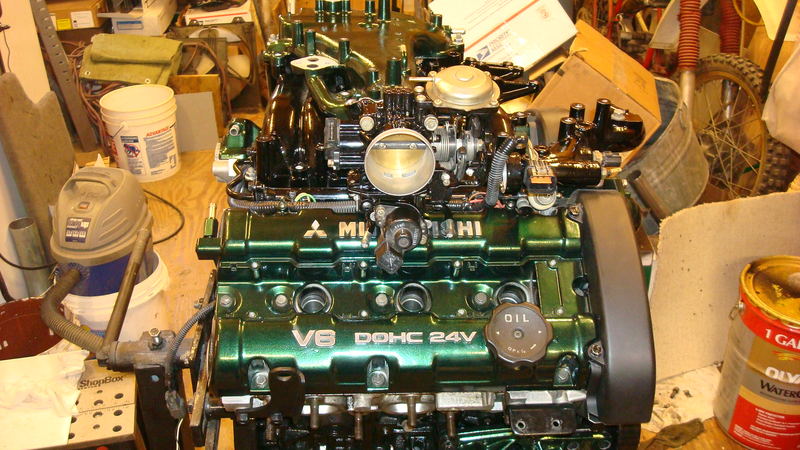 One of the challenges of converting the front wheel drive engine to rear wheel drive is the water pump routing to the back of the engine. Due to clearance in the Montero Sport rear engine compartment the thermostat will need to be relocated. 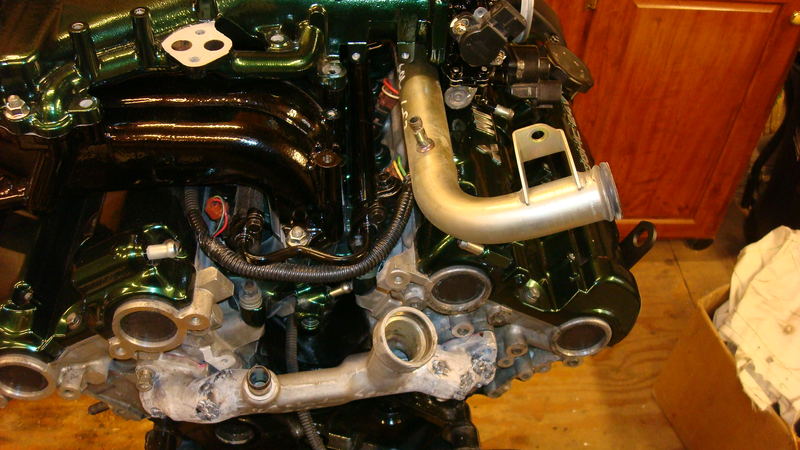 This piece is made from three pieces, the center from the Montero and the two ends from the DOHC. 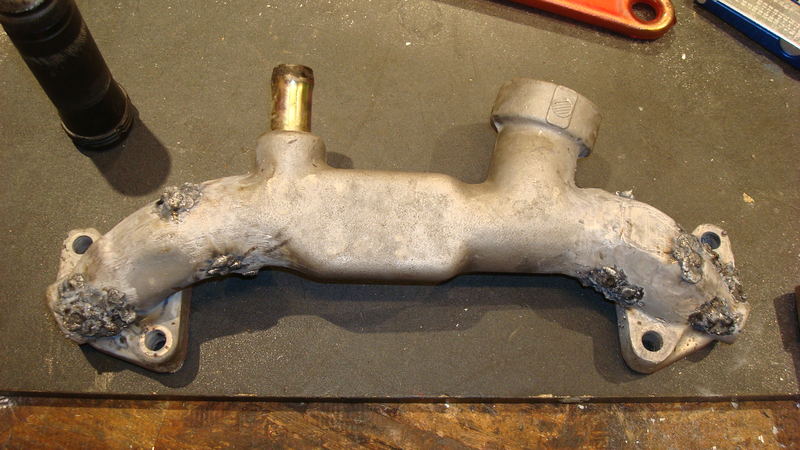 The Air Conditioner and the Power Steering Pump are both on opposite sides as compared to the Stock location, so all that will need to be modified and re-routed to make it work. This engine has a stock HP of 205 so it should be a nice one when completed. Updates to come, what do you think Cwic? |
|
|
|
Post by cwic on Jan 22, 2011 10:11:32 GMT -5
Is this the setup you are building with plans to install a turbo? Much braver man than me! I also wonder if you will not have to modify the pump for the breaks on the drivers side (I think that is what it is, the master cylinder attaches to it) to have enough clearence for the heads in that engine bay. This may put you at 205 to the wheels before the turbo!
|
|
|
|
Post by twood3006 on Jan 22, 2011 18:34:59 GMT -5
It will clear with a minimal amount. The SOHC heads aren't exactly small either, the DOHC are a bit wider and taller, but the engine itself sits low in the engine bay.
I was going with the turbo but then got into the supercharger side of things because of the power-curve. I have a Eaton M90 that I shortened, modified and ported to fit in the engine bay that I plan to use. It has the same number of belt ribs as the DOHC.
Planning on reusing the throttle body from the SOHC at first until I get things sorted out before adding the supercharger, at least that is the current plan. One issue at a time.
|
|
|
|
Post by buggzyy on Jan 23, 2011 1:46:15 GMT -5
I wonder if a 99 and older Montero SR DOHC motor is the same. It looks like the water pipe comes from the rear like the newer ones and has the T-stat up front. You may have to fit a water pump of of the same truck too cause they have the housing that connects to the t-stat housing. good luck with your project.
|
|
|
|
Post by twood3006 on Jan 23, 2011 16:51:20 GMT -5
Is that a 3.0 or a 3.5L engine. The SOHC 3.0L does basically the same thing, but I am trying to go a cheap and reliable as possible, since the water pump on the DOHC is new, I am heading that direction.
I would rather spend a day or two fabricating and spending $20 than spending 2 hours and spending $80. Cheap, what can I say. As long as it is done with reliability in mind than I will be happy.
Stay tuned more to come.
|
|
|
|
Post by buggzyy on Jan 24, 2011 2:07:55 GMT -5
Its a 3.5L I understand your willingness to save money but I don't really see any other way to route the coolant back up front with a t-stat with out that pump. since your clearance in the rear is limited. Unless you were able to shift the engine forward just enough to clear the firewall then just run long hoses up front. I can't wait to see what you come up with this looks like a cool project. happy wrenching
|
|
|
|
Post by twood3006 on Jan 24, 2011 21:35:45 GMT -5
Your right about that. I am going to visit some junkyards and do some research before I decide which course to take. This one has been causing me more headache than anything else so far.
She has got to run cool!
|
|
|
|
Post by twood3006 on Mar 6, 2011 16:15:02 GMT -5
 Uploaded with ImageShack.usHere is a updated shot of the top end. Using my stock intake to the DOHC Lower Manifold.  Uploaded with ImageShack.usHere is a closer shot. Let's see who can spot the most mods from stock so far.  Uploaded with ImageShack.usFrom a different angle.  Uploaded with ImageShack.usHere is one major mod, this part was three parts before being cut and welded together.  Uploaded with ImageShack.usWork in progress, doesn't quite fit...yet.  Uploaded with ImageShack.usCustom headers to come. |
|
|
|
Post by bdmontero on Mar 6, 2011 17:41:28 GMT -5
There's some high output headersfor sale on ebay for a 3.5l on the australian site for 400 u.s.
|
|
|
|
Post by dannytuned on Mar 11, 2011 9:24:05 GMT -5
Cool project.
I'll be tuned in to see how this one turns out.
How bout some bigger pics???
|
|
|
|
Post by twood3006 on Apr 26, 2011 8:26:13 GMT -5
It's been a while since I have updated anything on this, so at Clays request here is what I have been up too. Got all of the electrical done on the engine, along with some minor relocation of things in my engine compartment, and the supercharger bracket and mounting. Looks like the hood will be modified to accommodate it.  Here is a shot of the drivers side bracket that hold the transmission dipstick line. The DOHC is about a half inch wider on each side.  Here is the two piece supercharger bracket.  Another angle  One more angle.  The entire bracket took more time to figure out how I wanted it then it did to make it, still took a week of on and off working to complete. Here is the 1/2" aluminum plate that the supercharger will bolt too, along with the piping to the upper air inlet.   Here is the supercharger mounted and belt on, I used sewing thread to line things up.     That is where I am at. I still need to route the intake piping to the supercharger from the throttle body and from there to the air filter. And of course weld it all together properly. After that I will start the install using the N/A DOHC for the break in period and bolt on the supercharger after breaking it in. Any body have any suggestions? |
|
|
|
Post by bdmontero on Apr 26, 2011 9:06:54 GMT -5
Yes. Why use a roots type supercharger?? Prochargers are a good way to go. Ttheres a lot of parasitic loss with the type you have. I would do a procharger or something similar. It would take up waaaay less room and produce more HP and better mileage. Just my two cents.
|
|
|
|
Post by twood3006 on Apr 26, 2011 9:17:54 GMT -5
It's simple math BD, this was way cheaper although more time consuming. Thanks for your input. If I could have had my way, I probably would have gone that route, but I could not find one for under a grand. I have about $150 invested in this setup.
I did oversize the supercharger a bit though, it is a M90 used on the 3.8 liter GM engine, and I have the ability to put a smaller pulley on supercharger if I want more boost, also have an electronically controlled boost solenoid so I can boost when I want it to to control mileage.
It should be a good combo when dialed in. I am looking to run no more than 6 psi of boost on the stock N/A pistons, I can always switch to turbo pistons and run upwards of 18 psi if the supercharger can pump that out. That is way down the line though.
|
|
|
|
Post by cwic on Apr 26, 2011 21:22:55 GMT -5
Are you going to keep the EGR or install a blockoff plate? Also, what is the fireing order for the DOHC, same as the sohc?
|
|
|
|
Post by twood3006 on Apr 27, 2011 7:51:24 GMT -5
I plan on keeping the EGR, I tried to bypass it but decided it was more work than it was worth. The firing order is the same 1-2-3-4-5-6, as is the signal for the crank and cam sensors. Even the timing for the curb idle is the same 15 degrees.
Still I must be missing something.
|
|


